History Of Photography
|
|
900AD- Alhazan 900AD- Camera obscura, helped artists draw first 3d scene on a flat plane 1419- Renaissance artists and Leonardo Da Vinci 1500- A rennaisance camera obscura 1724- Johann Schultz (discovered silver compounds change in light but couldn't fix the image) 1787- Louis Daguerre, invented the first type of practical photography known as the daguerrotype 1826- Joseph Nicephore, invented heliography 1833-An example of a daguerrotype was made 1840-Henry Fox Talbot, invented salted paper and calotype processes in photography 1850-An example of a calotype print 1854-George Eastman, brought photographic use of roll film into the mainstream 1870-Richard Maddox, gelatin dry plate camera. This involved the coating of glass photographic plates 1877-Edwaerd Muybridge Horse, a short silent stop motion series depicting the movement of a horse 1882-Nicephore Niepce, view from the window at le gras, the oldest surviving heliographic image 1885-George Eastman's rolled film, an American entrepreneur who founded Kodak camera 1887-Edwaerd Muybridge, known for his work in studies of motion and motion picture photography 1925-Leica camera, Oskar Barnak- A German photographer who founded the Leica camera 1975-Steve Sasson, inventor of the first self-contained digital camera. |
Why Is Photography So Important/How Does It Influence Us Today?
Photography not only has an extensive history behind it, it's crucial for areas such as advertisement, selling products and appealing to audiences. It draws people in for consuming products such as foods, phones, holiday destinations. Secondly it can evoke emotions and capture a moment in time in a visual way, holding memories and snippets of life that can't be relived. In addition to this, photography is vital for historians and gathering evidence, they present moments of the past, how people used to look, what people wore, where they stayed, and many other factors are passed on for years through images. It's a powerful form of self-expression to convey your creativity and things you're passionate about. It can story-tell and move people, for instance photojournalism visualizes the stories of many that don't get a voice otherwise. It can inspire you to travel more, appreciate the finer details in your life and the environment around you. It can draw attention to nature and bring us closer to things we may never notice, editing in photography allows us to distort reality and gain a new perspective of the reality around us in a way we've never seen before. Lastly, a lot of people are visual learners that need photos and visual representation to help understand the world around them and certain topics.
Camera Obscura
What Is A Camera Obscura?
A camera obscura works in a similar way to the human eye. It is the ancestor of the photographic camera, and has been used for many years. The earliest versions consisted of small darkened rooms with light coming through a tiny hole. Early camera obscura's tend to be large and placed inside tents, as this invention advanced portable versions made from wooden boxes included a lens instead of a pinhole, this allowed you to adjust the focus of your image. The earliest written theory of the camera obscura was found in the studies of a Chinese Philosopher, Mozi (470-390 BCE). He found that the image inside the camera is flipped upside down because light travels in straight lines from its source. Later during the 4th century the greek philosopher Aristotle discovered that sunlight passing through the gaps between leaves projects a photo of an eclipsed sun on the ground
What Are Some Examples Of A Camera Obscura?


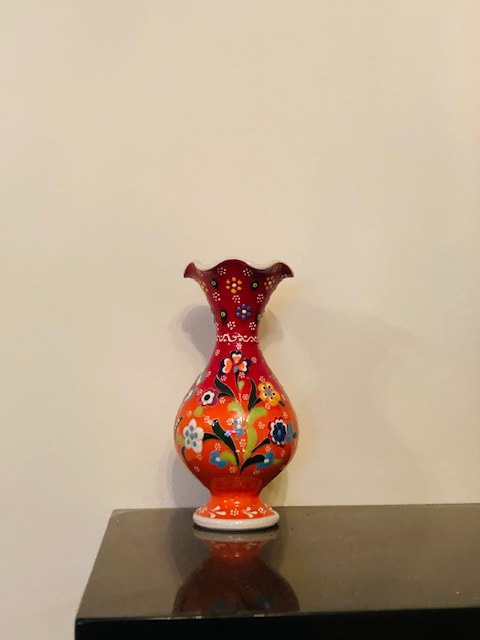
Camera Obscura: My Response
Image 1
Evaluation 1: What Do I Like About This Image + What Could Be Improved?
What Went Well: There's a good use of lighting and focus on the camera obscura, it's also framed quite well in the centre of the image
What Could Be Improved?: The tape on the top of it doesn't look as neat as it could have done, I think it would have made for a better picture if it had been done with less tape
What Could Be Improved?: The tape on the top of it doesn't look as neat as it could have done, I think it would have made for a better picture if it had been done with less tape
Image 2
Evaluation 2: What Do I Like About This Image + What Could Be Improved?
What Went Well: I've outlined in pencil the view that I could see out the window using the camera obscura
What Could Be Improved?: At the top of the image it's been glued a bit messily which impacted the quality of the photo from looking smoother
What Could Be Improved?: At the top of the image it's been glued a bit messily which impacted the quality of the photo from looking smoother
Image 3

Evaluation 3: What Do I Like About This Image + What Could Be Improved?
What Went Well: Some of the view has been reflected in the camera obscura from outside the window and the outline can be seen of the trees and the window sill
What Could Be Improved?: The exposure is too bright behind the camera obscura and makes the image look too bright and overpowering because of the light from the window
What Could Be Improved?: The exposure is too bright behind the camera obscura and makes the image look too bright and overpowering because of the light from the window
What Composition Techniques Have Been Used?
Balance: This has been used in some of the pictures as I have tried placing it in the middle so the weight on eithr side of the photos are equal
Aperture: A wide aperture has been used for this photoshoot
Rule Of Third: This technique has not been included in this photoshoot
Lighting: There have been a variety of lightings included in this photoshoot, some too bright
Depth Of Field: Most of these pictures have a shallow depth of field
Aperture: A wide aperture has been used for this photoshoot
Rule Of Third: This technique has not been included in this photoshoot
Lighting: There have been a variety of lightings included in this photoshoot, some too bright
Depth Of Field: Most of these pictures have a shallow depth of field
DSLR Camera
What is a DSLR Camera?
DSLR stands for digital single lens reflex. Digital means that it works with a fixed sensor, single lens refers to the camera using the same lens for focusing, framing and taking the photograph. Reflex means the system where the mirror splits towards the viewfinder. This allows you to see an exact, optical view of your image.

1. F1: Shutter Button= The shutter button has two stages, half pressing the button activates the AF function while pressing it down fully releases the shutter.
2. F2: Red eye reduction/self timer lamp= If red eye reduction is enabled on your camera, pressing this specific button will light up the lamp when you use the built in flash. As for the self timer, it will blink during the timer until the picture is taken.
3. F3: Lens mount= The section that connects the interchangable lens to the camera body. To attach the lens, you line up the red dot and white square on the lens mount and turn the lens clockwise.
4. F4: Align the mark on the lens when you're attaching or detaching the lens. Red index for EF lens, white index for EF-S lens.
5. F5: Lens release button= Press button when you detach lens. The lens lock pin retracts when the button is pressed, so you can turn the lens freely. lock the lens by turning it till you hear it click.
6. F6: Reflects light from the lens into the viewfinder, which lets the photographer see the shot through the viewfinder. The mirror flips up before the shutter is taken.
7. F7: Built in microphone for capturing audio
8. F8: You can fire the flash in a dimly lit scene. The flash is automatically fired in some models.
Shutter Speed
What is Shutterspeed?
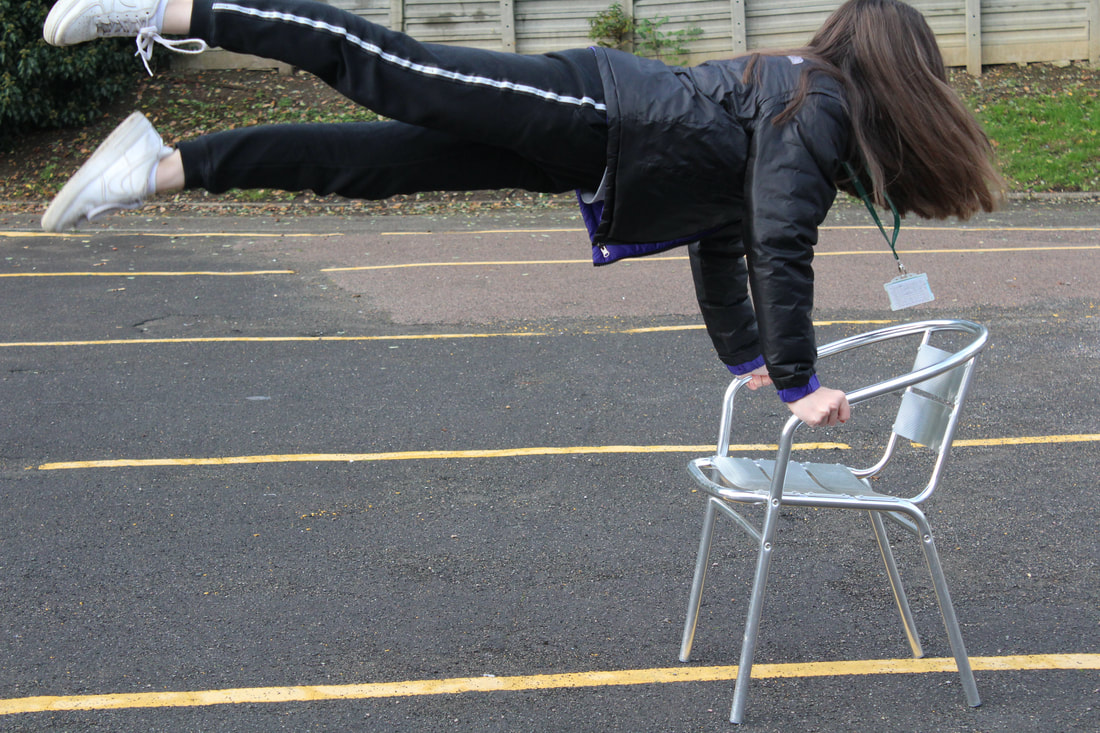
Shutter speed is a measurement of the time the shutter is open. This can be shown in seconds or fractions, for example 1/2, 1/4. The faster the shutter speed the easier it is to photograph. Slow shutter speed allows more light onto the camera. It can also be used to freeze motion. Here are some images using different shutter speed techniques:
Task
Take multiple pictures with an experimental range of different shutter speeds.
What Will I Need For This Photoshoot?
- A camera
- A model to do different jumps and poses in the air
- Natural lighting
- A chair to balance on
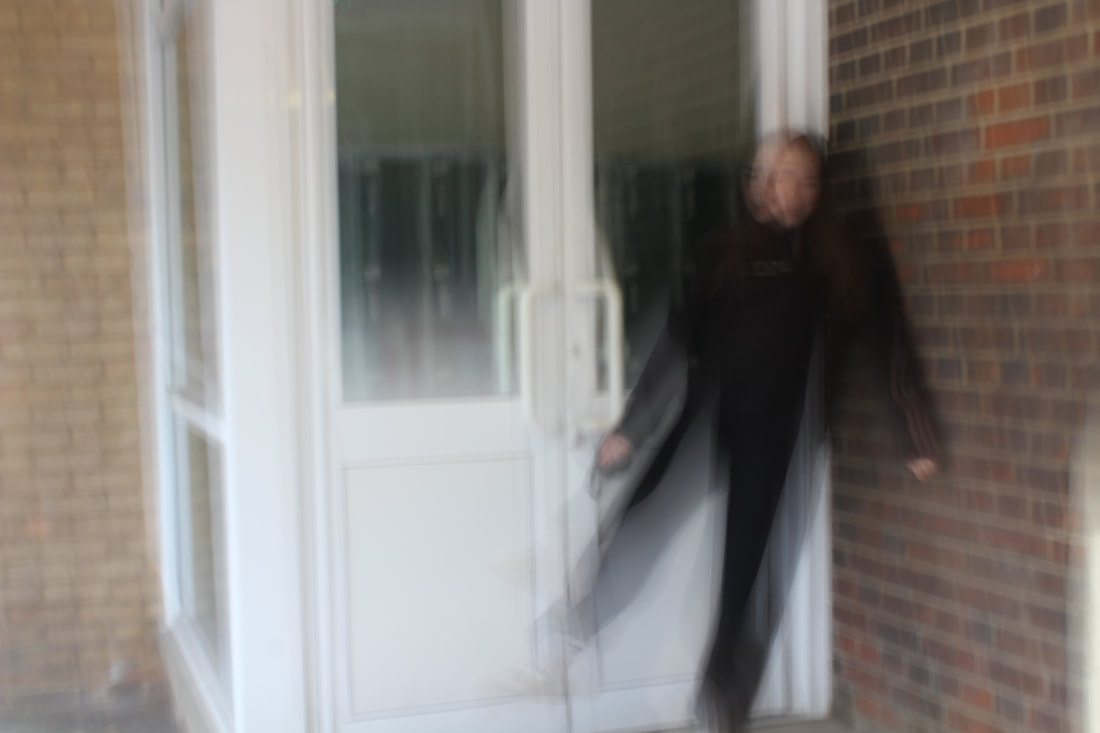
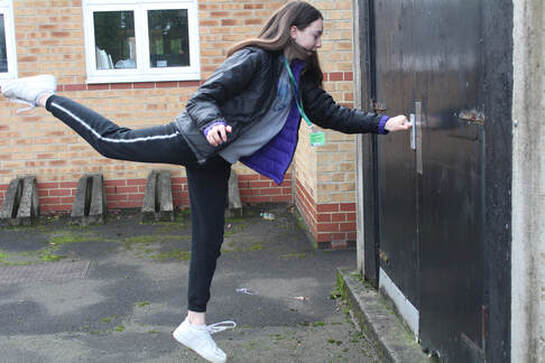
Shutterspeed: My First Response

|

|
What Went Well + Even Better If
WWW: I like that the pictures are taken in mid air
EBI: More photos in mid air and more angles
EBI: More photos in mid air and more angles
What Compositional Techniques Have Been Used?
- Balance: Has occasionally been featured in the pictures where the models balancing against the chair for example
- Rule Of Thirds: Has been used in the blurred picture by the door, this wasn't intentional but has been used
- Depth Of Field: Most of these pictures have a deeper depth of field
- Aperture: Large aperture
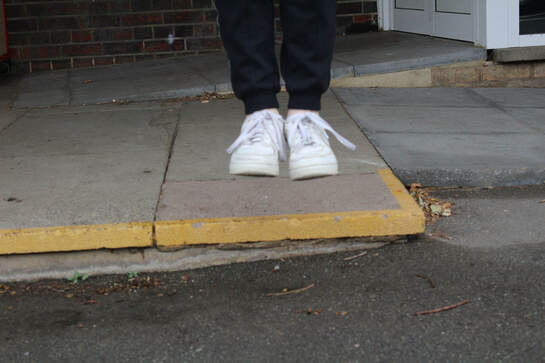
Levitation Pictures
What Went Well + Even Better If
WWW: Pictures taken mid air
EBI: More angles and places to take pictures
EBI: More angles and places to take pictures
Natsumi Hayashi
Who Is Natsumi Hayashi?
Natsumi Hayashi is a Tokyo based photographer who started publicly documented in 2009. She began taking portraits of herself floating mid air. Her project named today's levitation is based off her year long love and interest in flying.This picture is part of Natsumi's 'today's levitation' which is a self portrait project consisting of all her pictures captured in mid air. she got the idea from the idiom that 'to have one placed feet firmly on the ground. She believes that when she's lifted from the ground she feels free of any obligation to society. Her belief is that in contemporary we're surrounded by social stress. I like that this photographer is able to express her instant release from stress from every day life, through her photography as it acts as an escapism for her.
What Were Natsumi Hayashi's Intentions?
Natsumi stated in an interview that she first got the inspiration for her levitation project through the idiom "to have one's feet firmly planted on the ground," applied to a practical type of person. In Japan, where she is from, there is a similar phrase except Natsumi claimed that she was the opposite of practical.. Through this, she took the idea of being "firmly on the ground" in her self-portrait photos to reveal her true self. She staes that ''When I am free of the gravity inside the picture, I feel free of any obligation to society and live without being bound to many things. In contemporary societies, we are all surrounded by social stress as we are bound by the forces of the earth's gravity. So I hope that people feel something of an instant release from stressful, practical days by seeing my levitation series.'' I think the idea of her being lifted from the ground is meant to be a metaphor for letting go of the pressures and anxieties we can face in every day life.
What Wider Context Was Natsumi Hayashi Addressing?
Natsumi Hayashi's Photo's


Natsumi Hayashi: My Response (Unedited)
|
|
Natsumi Hayashi: My Response: (Edited)

|

|
Second Response
Natsumi Hayashi: My Second Response (Edited)
Francessa Woodman
Who Is Francessa Woodman?
Francessa Woodman was born in Denever, Colorado April 3rd 1958 and died January 19th 1981 in New York city. During her childhood she was surrounded by creative people like painters, film makers and critics. Her parents were artists, George Woodman who was a painter and photographer and Betty Woodman, an aspiring ceramic artist. As woodman grew up she attended a boarding school in Andover for photography classes. By the time she enrolled as an undergraduate, she was already fully committed to her interest in photography and developed ideas further from this experience. She committed suicide in 1981 at the age of 22 as she suffered with depression all her life.
Francessa Woodman's Photos


What Were Francessa Woodman's Intentions?
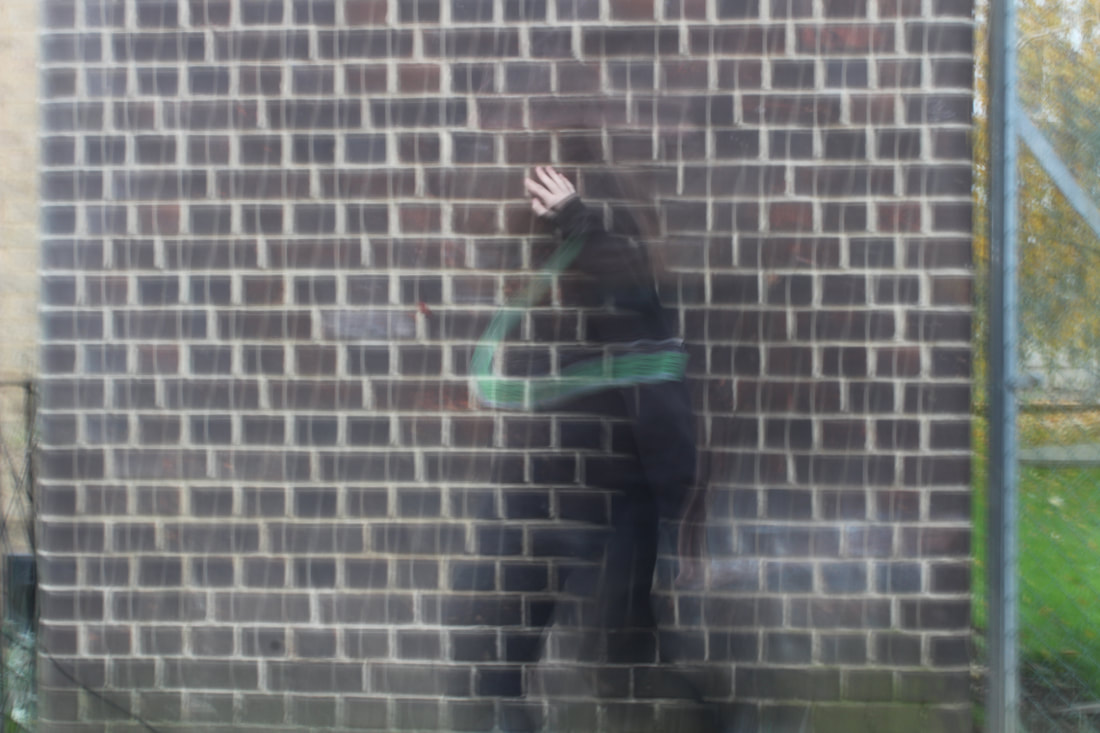
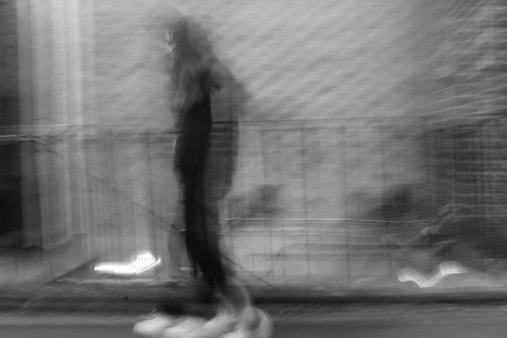
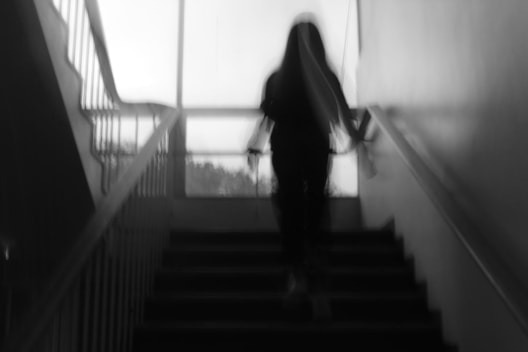
Francessa Woodman intended to show you what you don't see, which is the body's inner force. she allows the viewer to interpret and define her body themselves. She does this by capturing the pyschicality of her movement in blurry motion and has high exposure so it portrays the light in a way that captures her body, blurring the hands and face. I believe Francessa Woodman wanted us to build our own version of her in our minds, so we use imagination and it conceals her identity.
What Wider Context Was Francessa Woodman Addressing?
think the wider context behind what Woodman was addressing is the sense of urgency and pressure she felt as she reached her 20's and the multiple ways you can interpret this picture reflects how she felt in herself. This is shown by the long shutter speed and double exposure, the blurriness giving an eerily, empty feeling. In the picture she's seen bent down, back hunched and arms stretched out. The effect of the light coming through with the body dark and distorted makes her physical features appear grotesque and exaggerated.
What Techniques Has Francessa Woodman used?
This picture was taken in Woodman's studio. She has black and white photos, embraced with soft lighting and grain. She also adds dimension to flat images with layering to let the focus of the picture be seen from a different perspective. Another technique is adding the human body to tell stories, this was mostly displayed by limbs or the torso, always projecting away from the face. This adds abstraction to her pictures and enhances an unusual, obscure quality.
Francessa Woodman: My First Response

|


|
What Went Well + Even better If
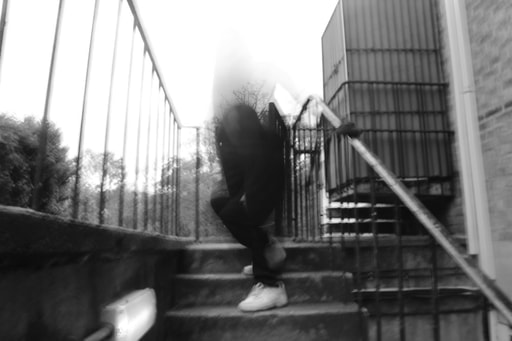
WWW: Accurately recreated the movement of the pictures
EBI: The last picture to be clear and not blurry since the entire picture is shaky.
EBI: The last picture to be clear and not blurry since the entire picture is shaky.
What Compositional Techniques Have Been Used?
Compositions
Aperture
What Is Apeture?
Aperture is the opening in a lens where light can be passed through. It controls the brightness of the picture that passes that falls on the sensor.The aperture you set impacts the size of the hole. It is measured in 'f numbers'. A large f number is, 8, 11 and 16. A small number is f 1.4, 2.8 and 4.5. A change in shutter speed doubles or halves the amount of light that gets in. For example f/8 is bigger than f/22. A higher aperture indicates less lighting is entering the camera, meaning it is a more convienent setting if you want your image to be shot in focus. A lower aperture tells us more lighting is entering the camera, this works better for low-light scenery. For portraiture a reccommended aperture is around f/2.8 or f/4. These were chosen because they capture the focus of the subject in depth and blur the rest of the background. The history of aperture dates back to 1880, photographers began to realize that aperture size affected depth of field. Aperture gradually became more more significant. Other models such as the iris diaphragm made its appearance as an adjustable lens stop in the 1880s, and it later developed into the standard adjustable stop in around 1900.
What Are Some Examples Of Aperture?


Apeture: My First Response (Edited)
|
|
Rule of Third
What Is The Rule Of Third?
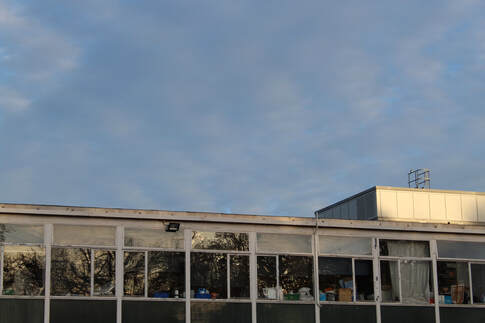
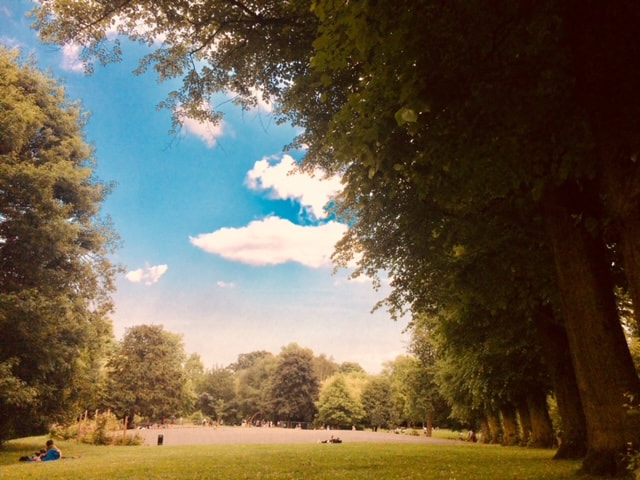
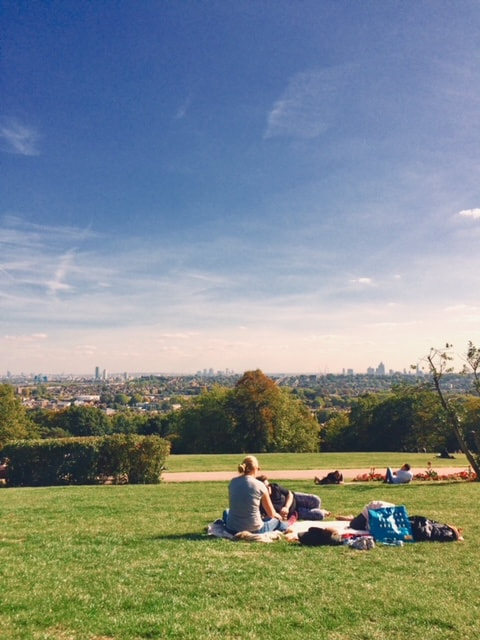
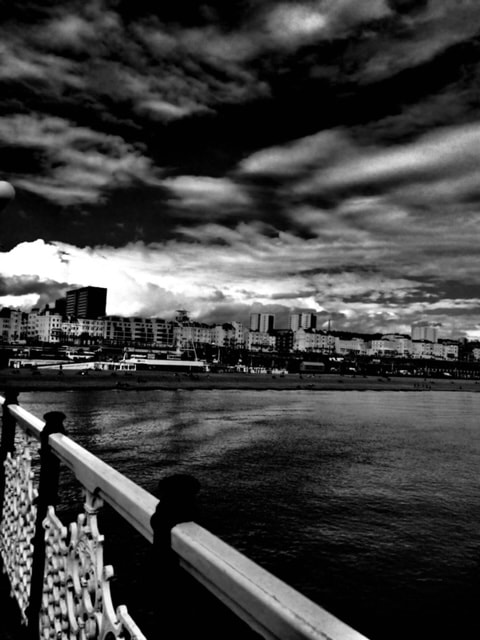
The rule of third is a composition where images are divided into thirds, horizontally and vertically. The main point of the image is placed at the intersection of the dividing lines. The reasoning behind using the rule of thirds technique is to prevent a horizon from appearing which divides the picture into half. It's also to shift photography away from having the subject in the centre of the image. Furthermore it gives equal weight to the halves of the image and balances it out well which creates for a strong picture. Sometimes pairs of straight vertical lines are used. The origon can be traced back to the 18th Century. The Rule of Thirds is a composition technique that I will be using a lot in photography, and sometimes one I was using without realizing. I think it looks the most visually appealing in pictures. It is commonly used in films as it softens the image and creates a striking composition, making the frames visually more attractive. It is said that the level of the audience's perception is increased if you place an image outside the centre of the shot.
What Are Some Examples Of Rule Of Third?


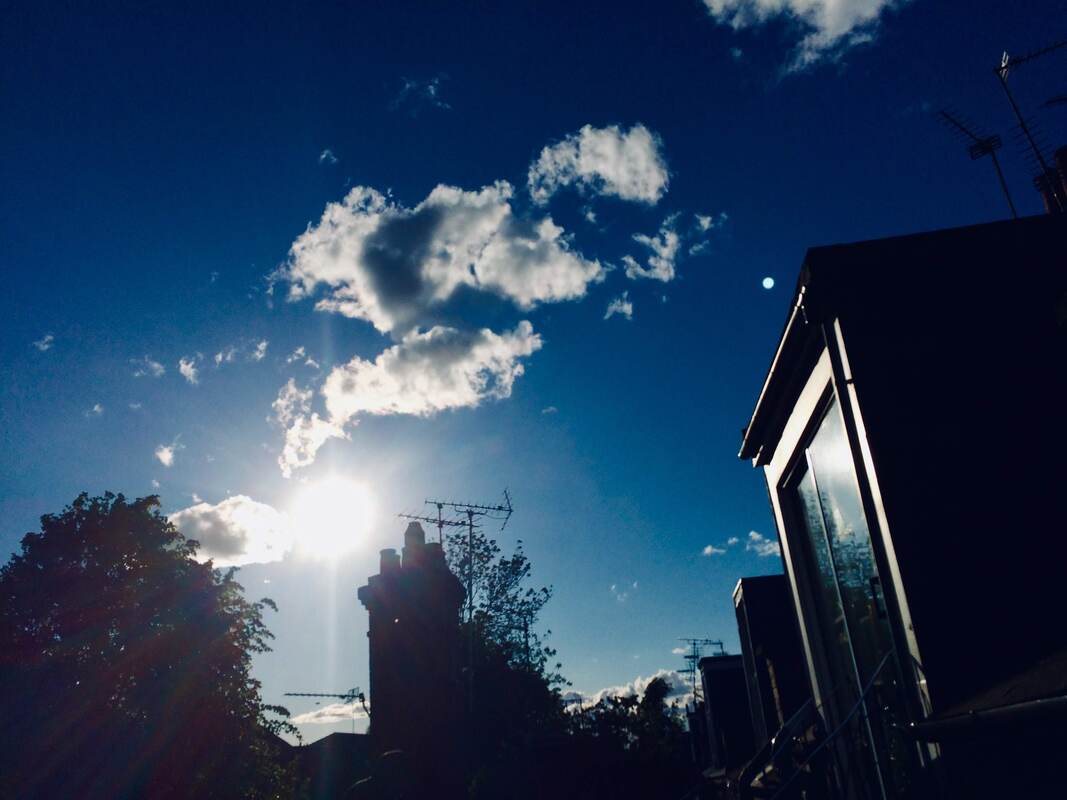
Rule Of Thirds: My First Response

|
|
What Went Well + Even Better If
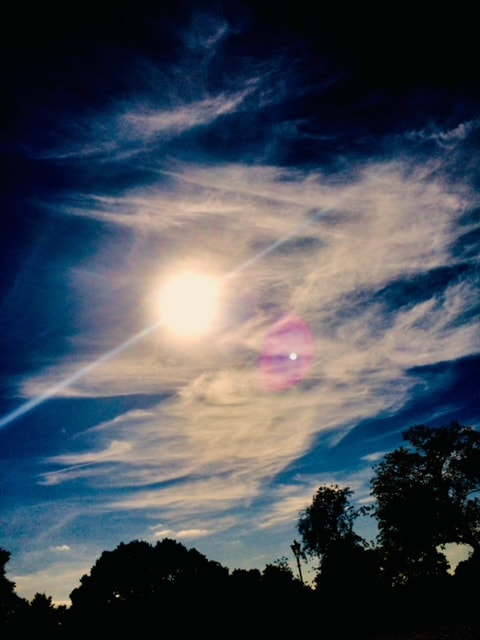
WWW: I like the contrast between the sky and the buildings, as well as the different colours it creates in the photo
EBI: Next time I would create different backgrounds to create a variety of different rule of third images
EBI: Next time I would create different backgrounds to create a variety of different rule of third images
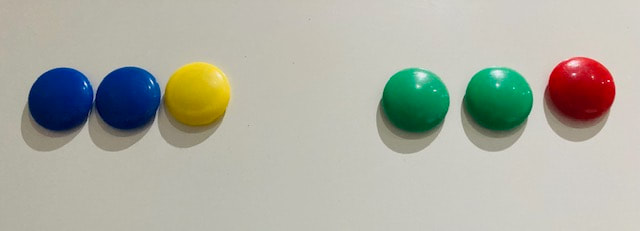
Balance
What Is Balance?
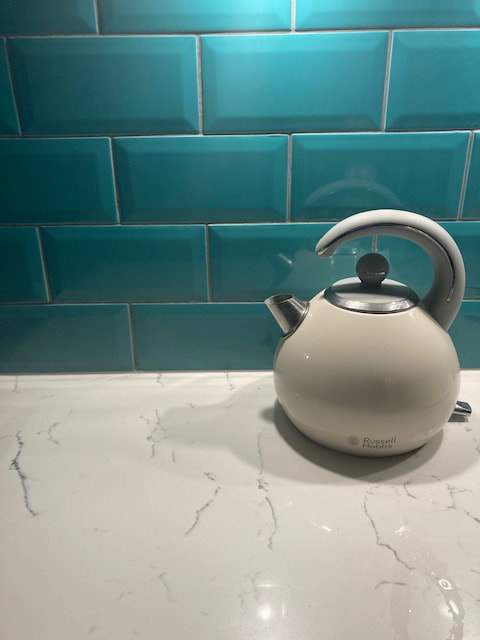
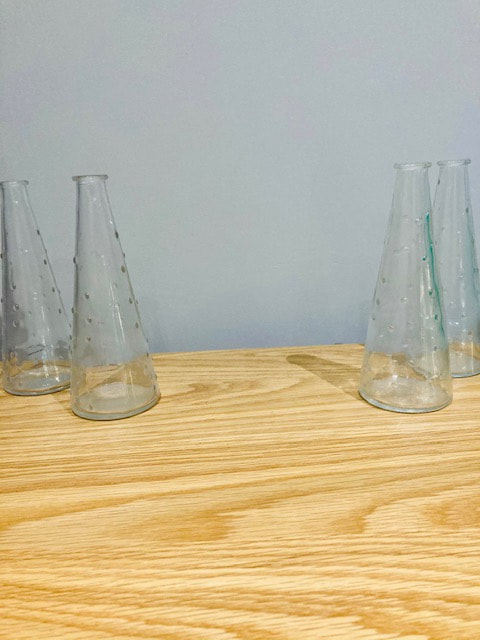
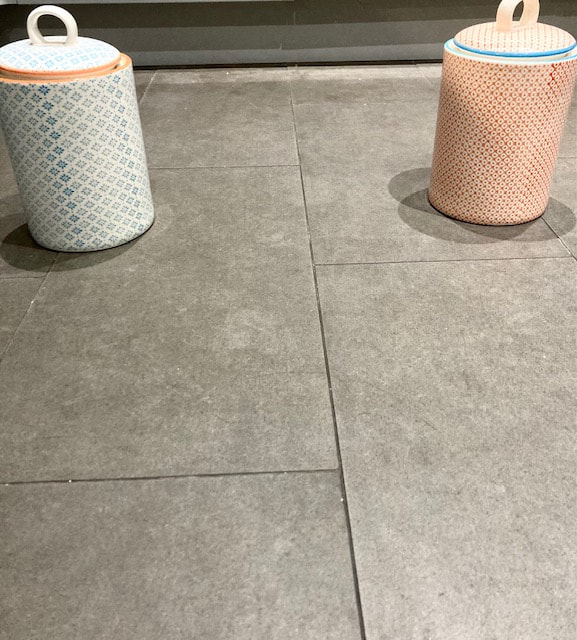
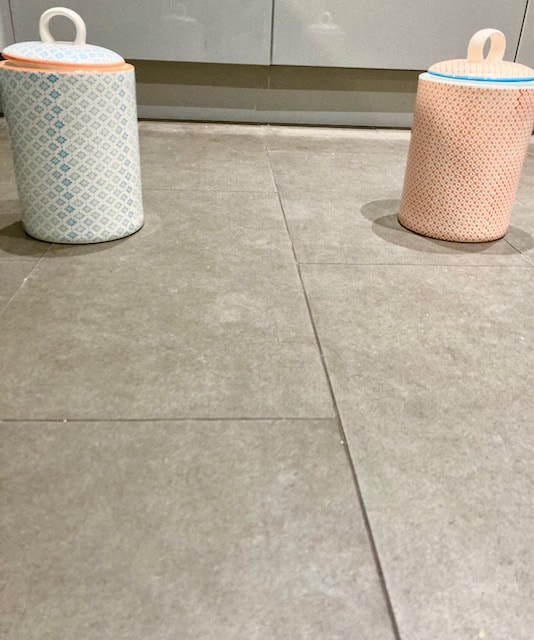
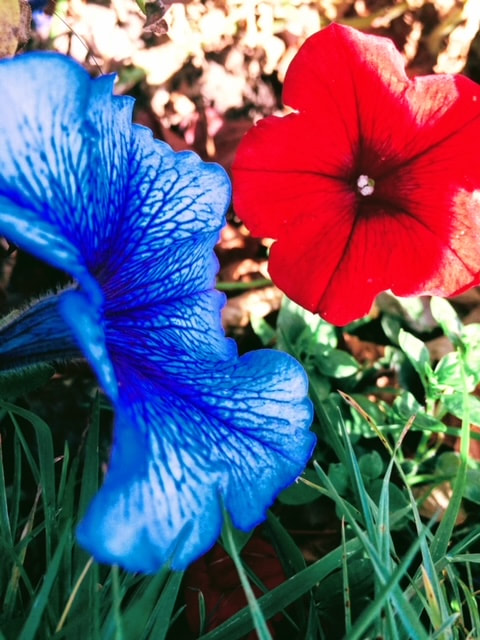
Balance is another compositional technique that juxtaposes pictures in a frame, making the objects of equal visual weight. This aesthetically pleasing photography device is really important in selling products, advertising and drawing people in to foods, countries, clothes, etc. There is a range of different types of balance such as symmetrical, asymmetrical, colour, tonal and conceptual. It influences the viewer in a variety of ways, and catches their attention. Photographs that are improperly balanced can be less appealing to look at, or if the heavier part of the photo is placed too far on the left or right. In photography, it could also symbolize mental steadiness, calm behaviour and peace. This reflects in the proportions of the image all being equal and balanced. The history of balance has always been around, because we're instinctively drawn to capture balanced pictures.
What Are Some Examples Of Balance?


Balance: My First Response (Edited)
|

|
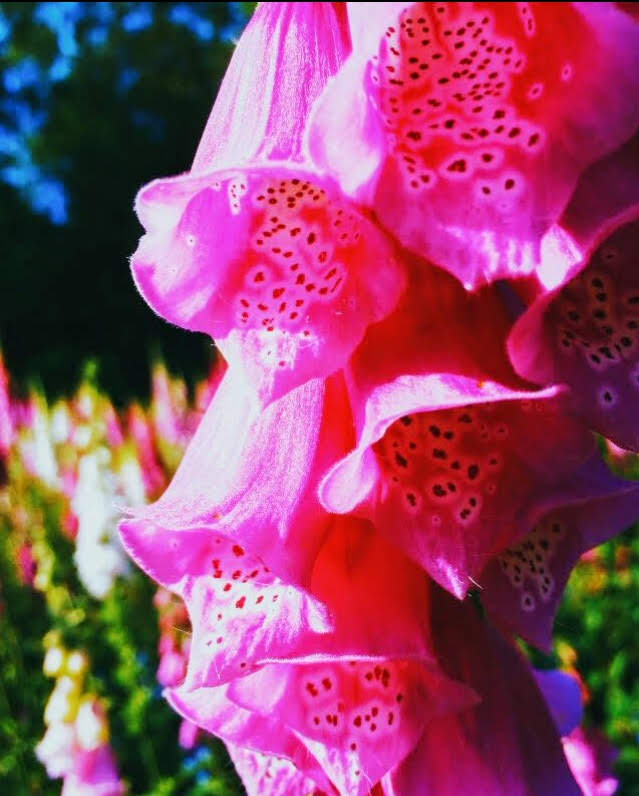
Depth Of Field
What Is Depth Of Field?
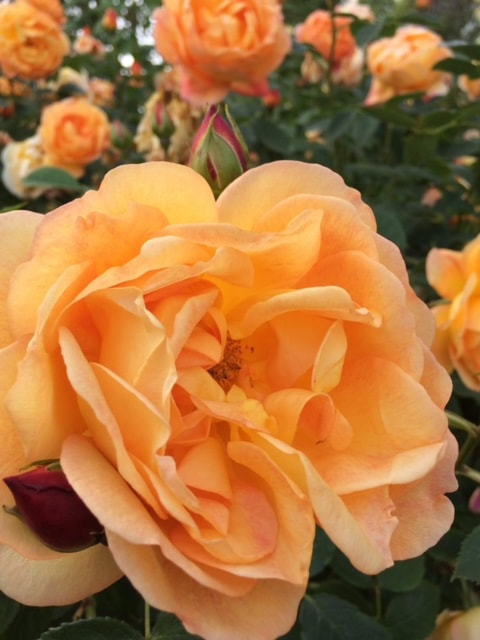
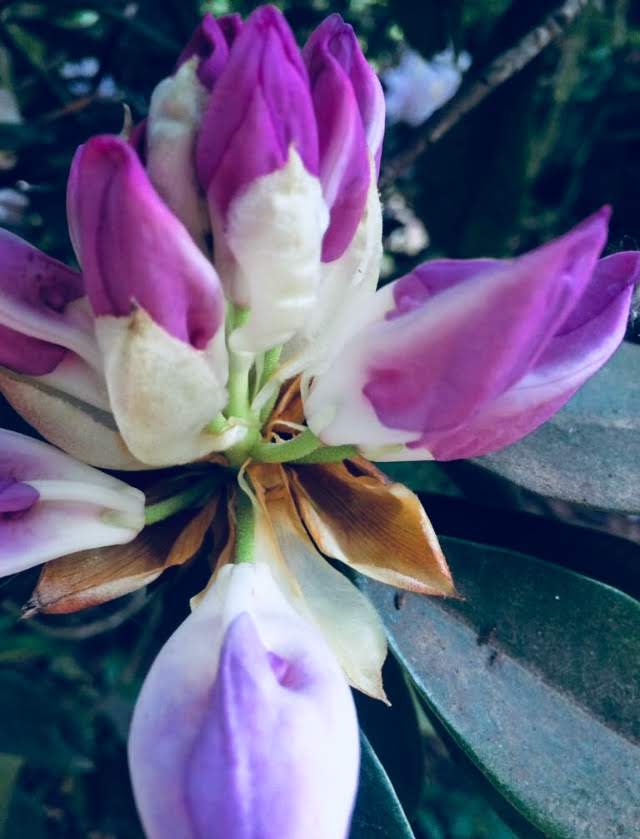
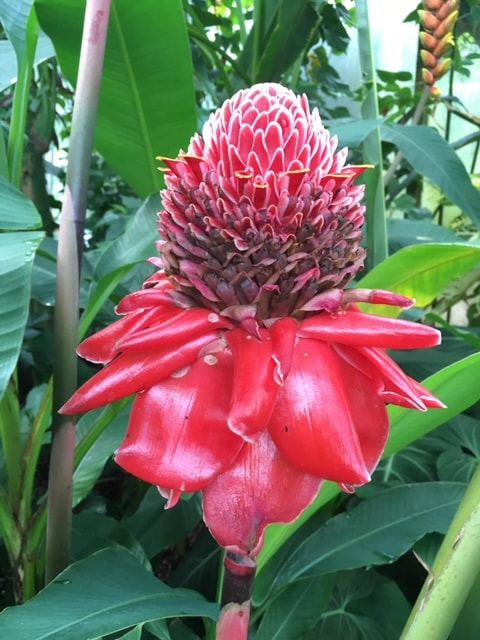
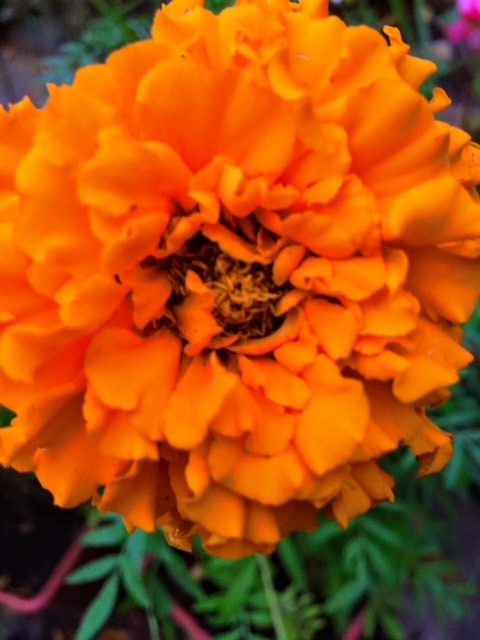
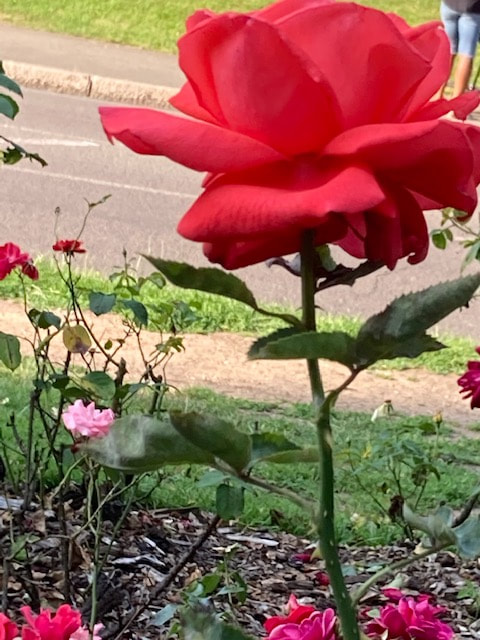
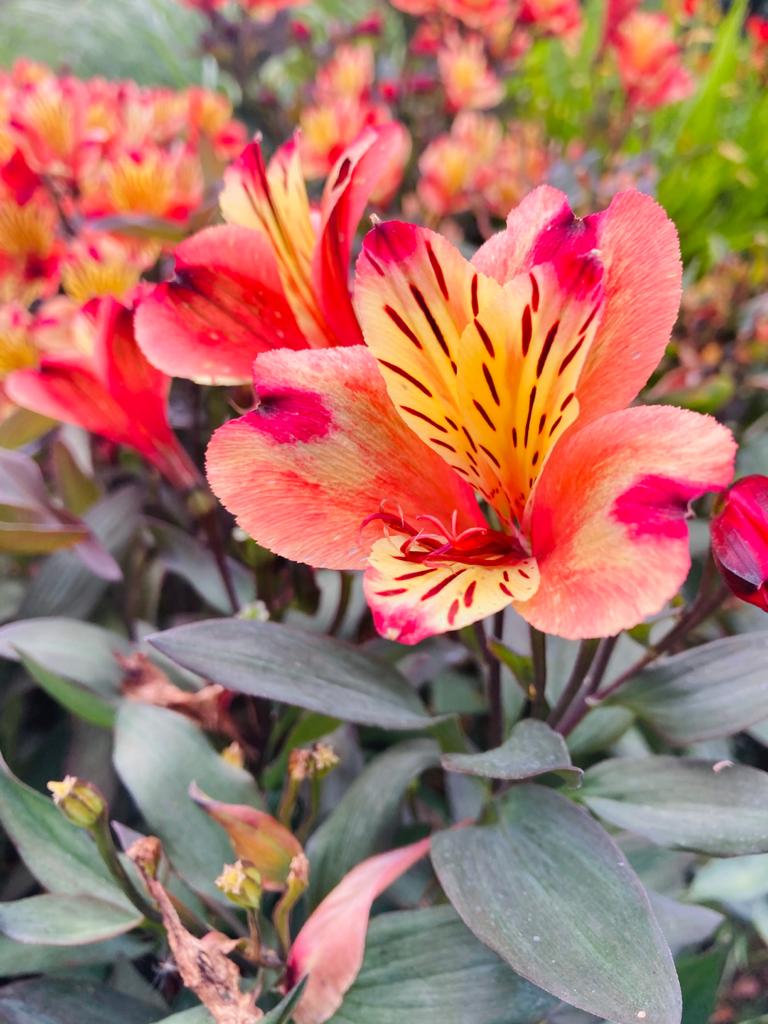
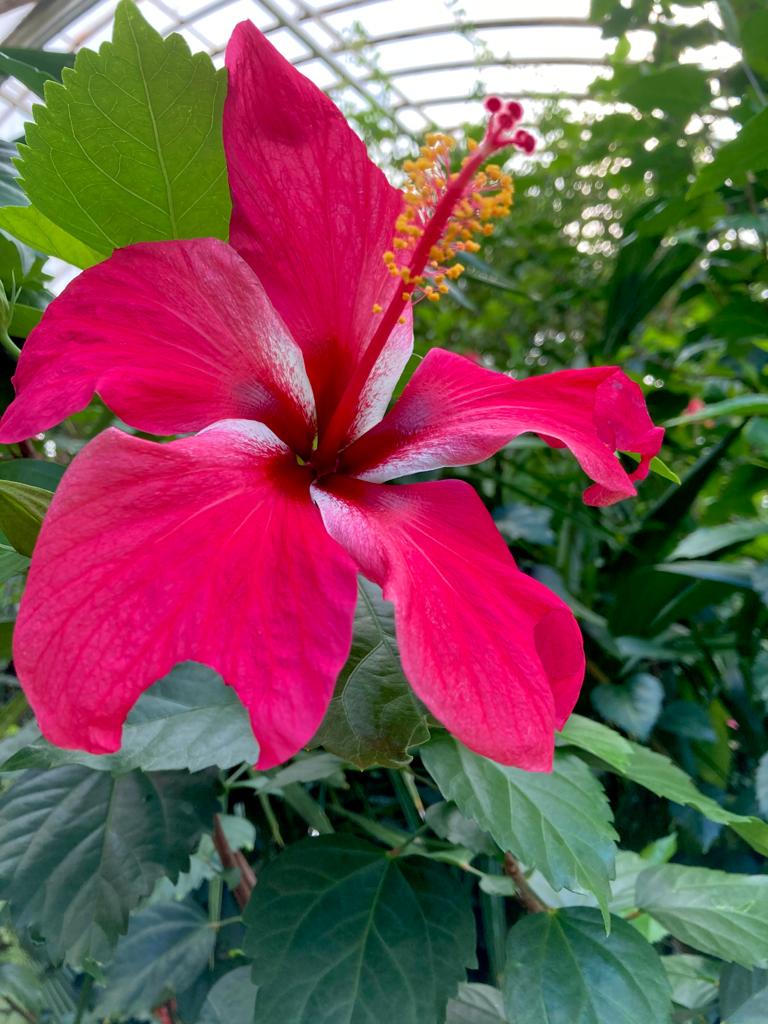
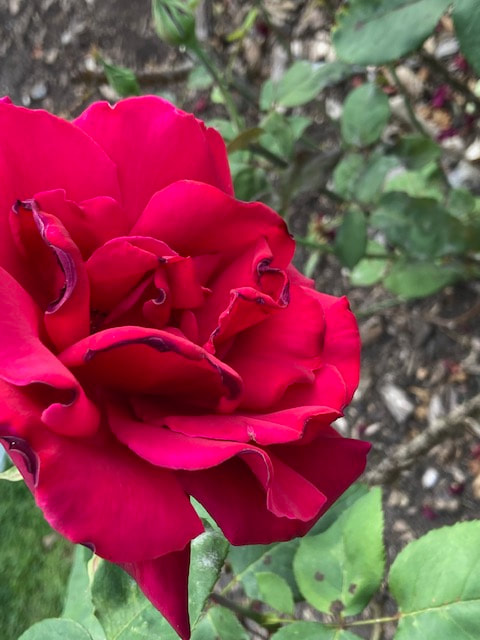
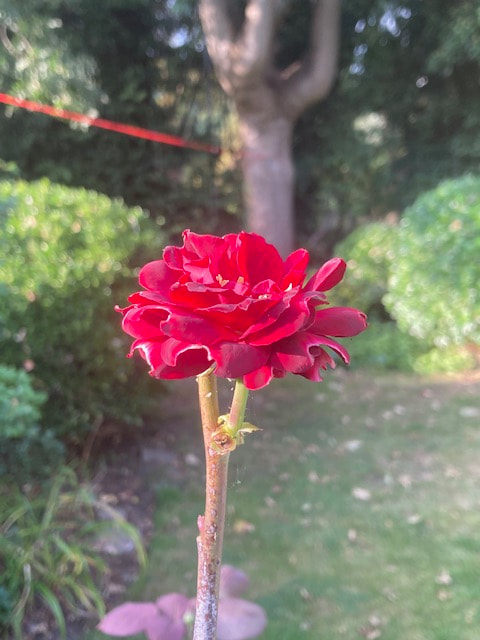
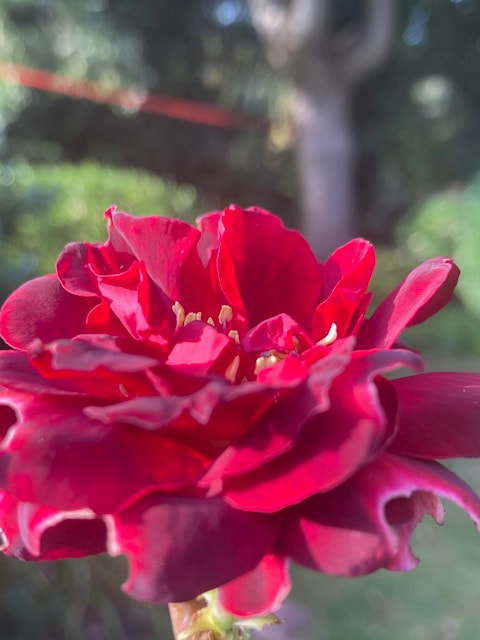
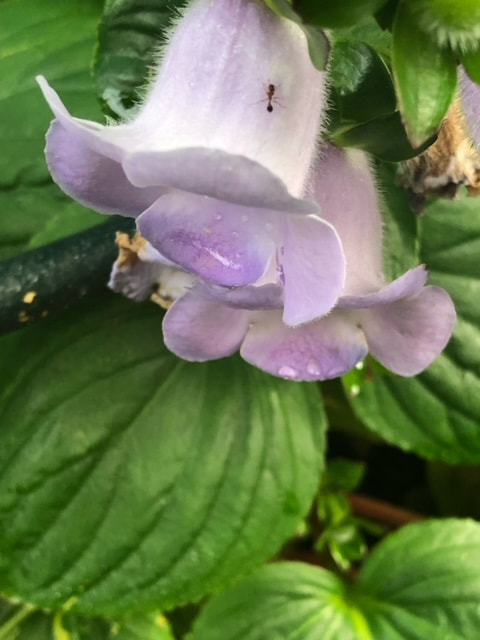
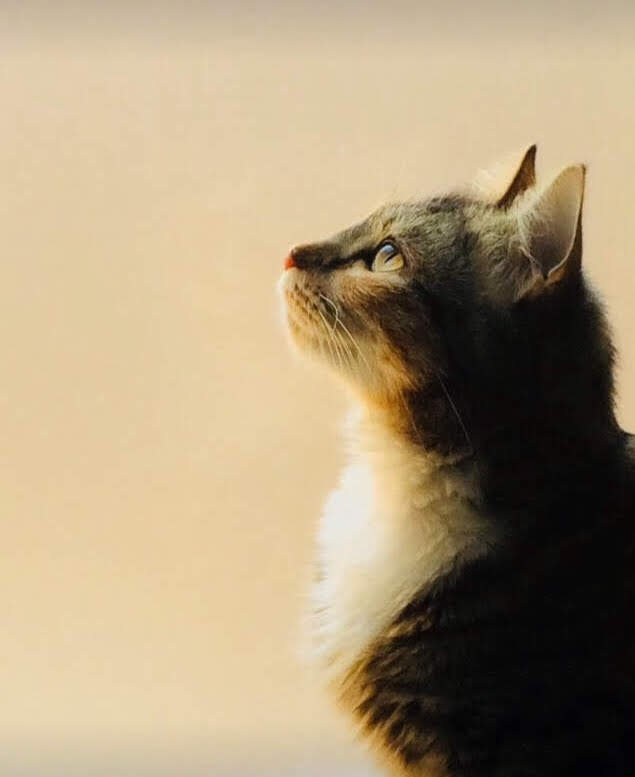
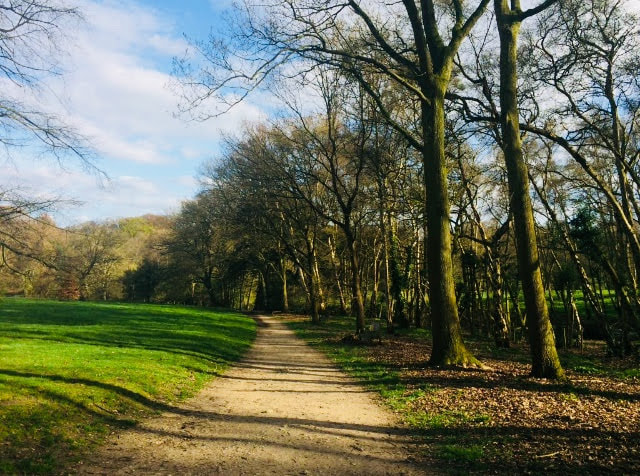
Depth of field means the amount of shot that will be in focus wether its close up or far away. Small depth of field means only a certain part will be focused but the background is blurred. A large depth of field is 1.4 or 2.8. In a photograph with, for example, a narrow depth of field only a fraction of the picture will be in focus and this is generally used for capturing nature so we can focus on flowers, animals or trees. A large depth of field is, on the other hand, much more of the scene is sharp and this is often found in landscapes where we want to capture the entire scene. This technique is vital for putting the attention of the viewer on what you choose, it emphasizes and highlights certain objects or characteristics of something. Depth of field has been explored for many years. For instance photojournalism and still-life photography will especially experiment with these. I think this technique is really important for all the styles of photography and will be adapting my knowledge of it to pictures.
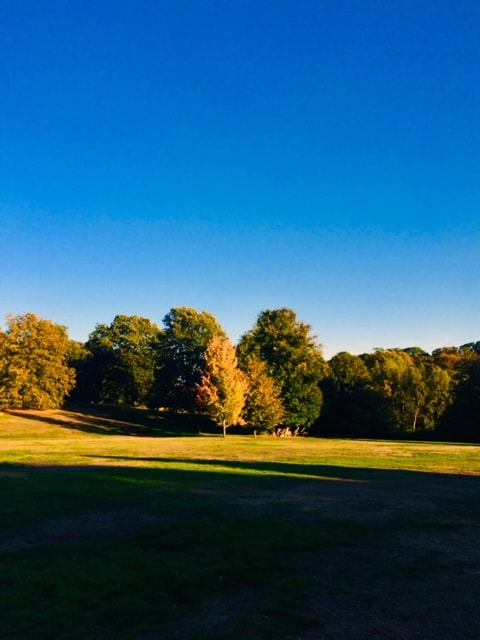
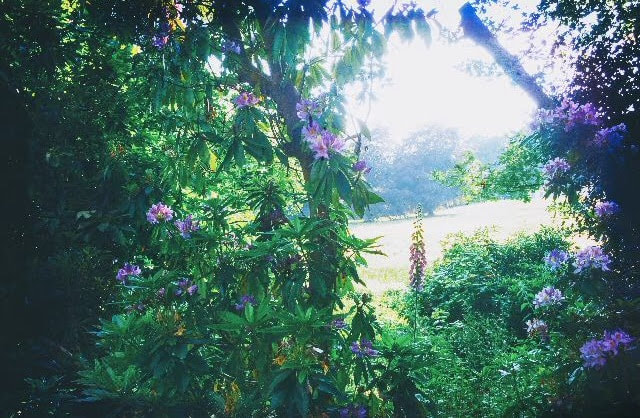
What Are Some Examples Of Depth Of Field?


Depth Of Field: My First Response (Edited)

|
|
Lighting
What Is Lighting?
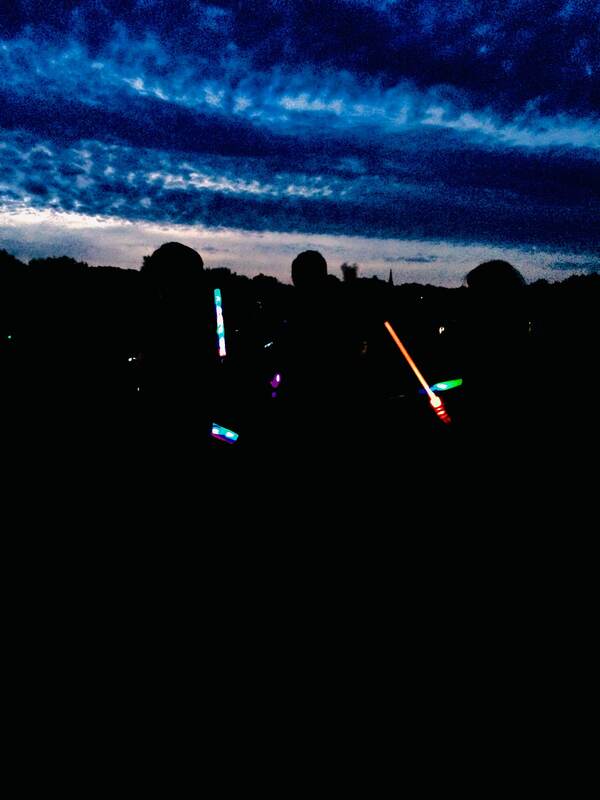
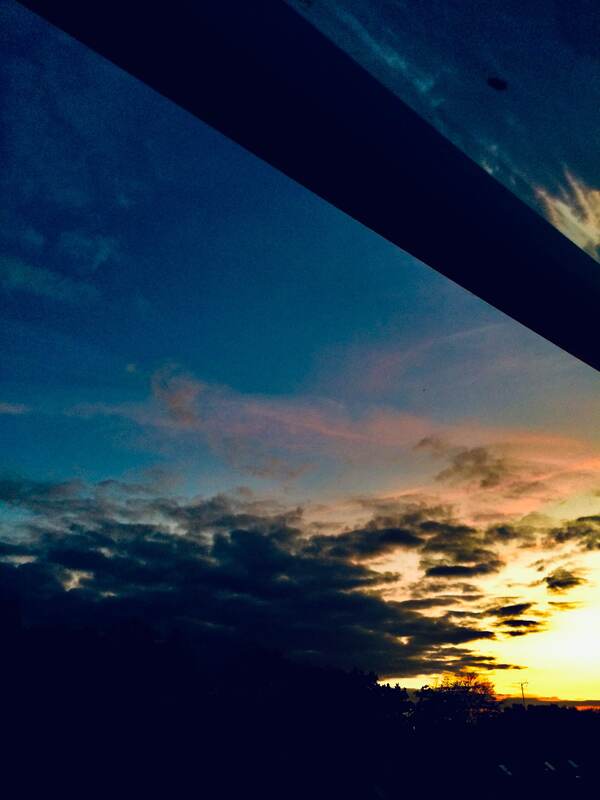
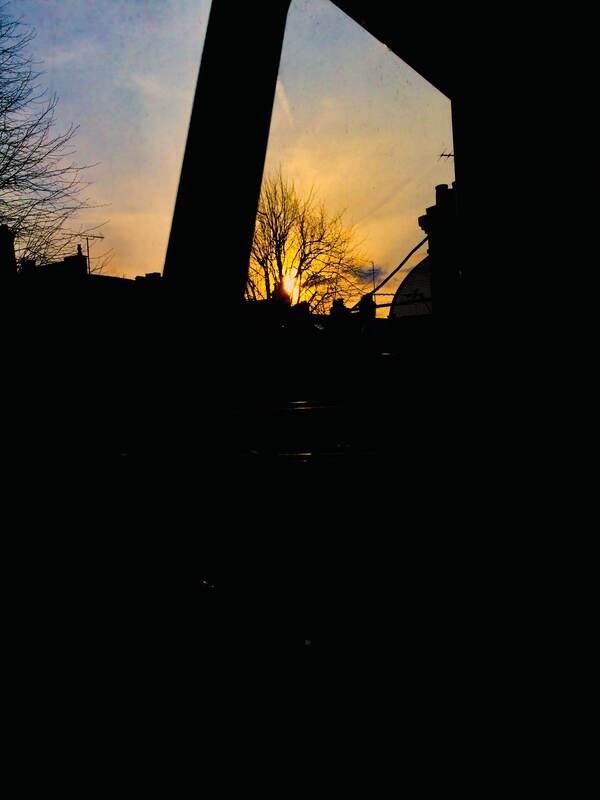
Lighting is an experimental technique that is often used in photography if we want o portray certain emotions or moods or convey particular messages. The power of lighting is very diverse a sit records the patterns of colour and shade, exposure is used to create to determine the atmosphere. We can find this commonly used in movies and shows, documentaries and theatre. Lighting will manipulate the texture and vibrancy of your image through hiding certain elements of the picture we want to conceal from the viewer's sight. There is a huge diversity in lightings, for example flat lighting, broad lighting, split lighting, rim lighting, and many more. Since this specific technique can be natural or artificial it is used in every image, in nature photography this is one of the key features. The first artificial light photography dates back to 1839. Limelight was produced by heating a ball of calcium carbonate in a flame until it became incandescent.
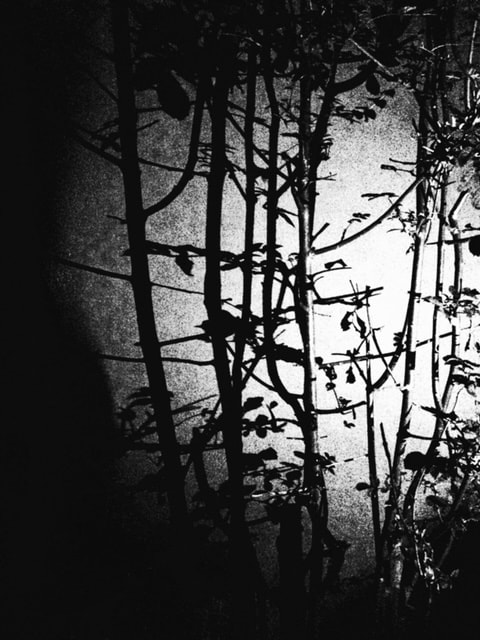
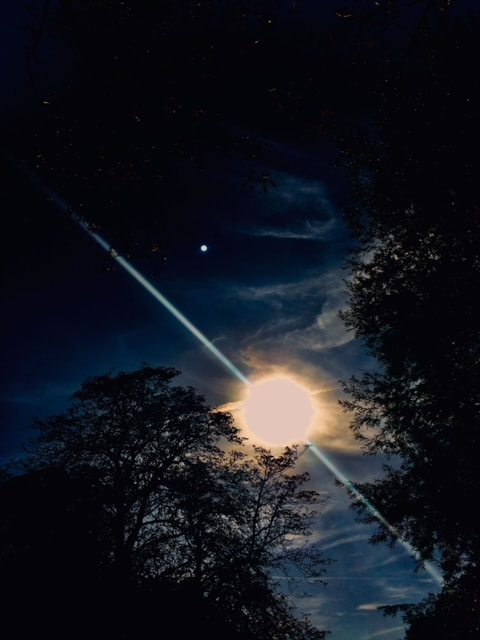
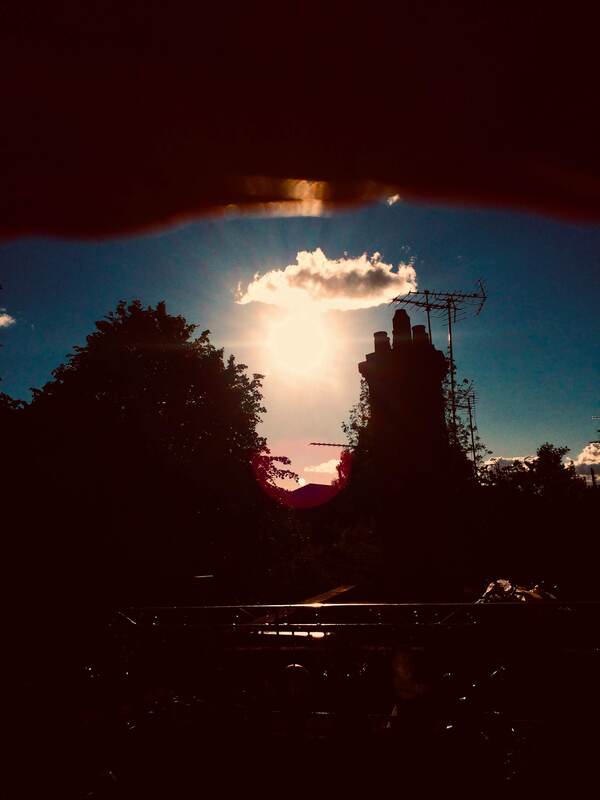
What Are Some Examples Of Lighting?


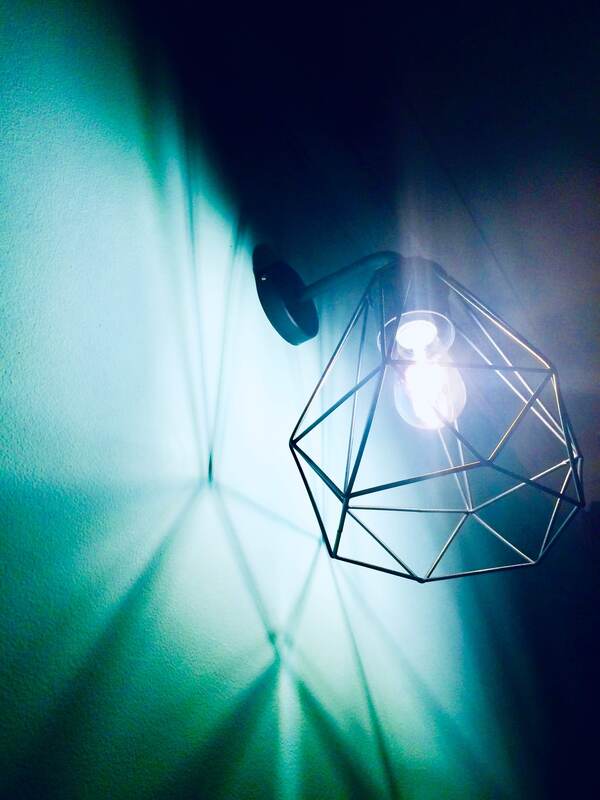
Lighting: My First Response (Edited)
|
|
Compositions: Second Set Of Responses
Apeture: Second Response (Edited)

|

|
Balance: Second Response (Edited)
|
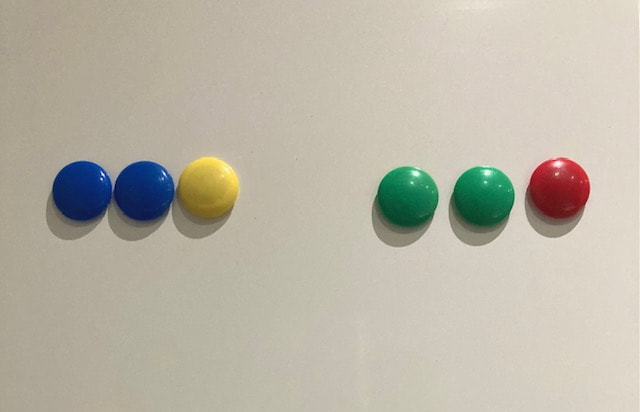

|
Depth Of Field: Second Response (Edited)
|
|
Rule Of Third: Second Response (Edited)
|
|
Lighting: Second Response (Edited)
|
|
What Went Well + Even Better If
WWW: A range of different techniques have been used, experimental lightings, apertures as well as balance. I like that some have been taken in the day and others at night, at home, in parks, gardens, roof terraces, high and low, etc
EBI: Use more variety of depth of field as the pictures look quite similar to the settings of the aperture photoshoot
EBI: Use more variety of depth of field as the pictures look quite similar to the settings of the aperture photoshoot
GIF
What is a GIF?
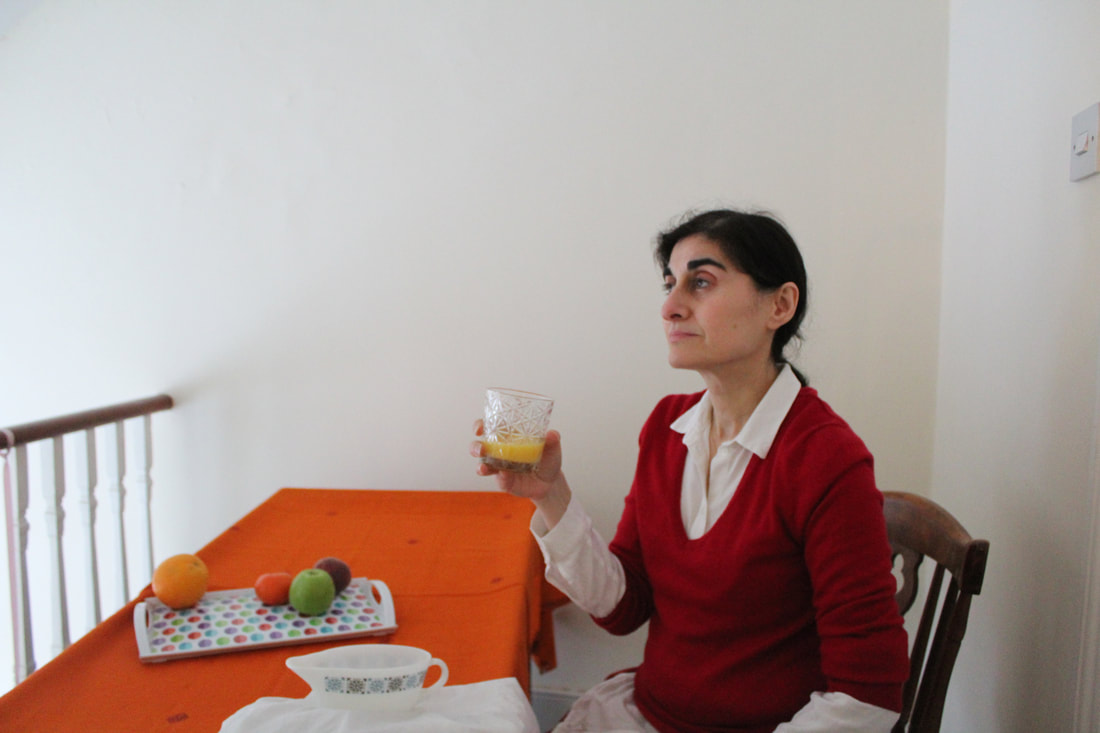
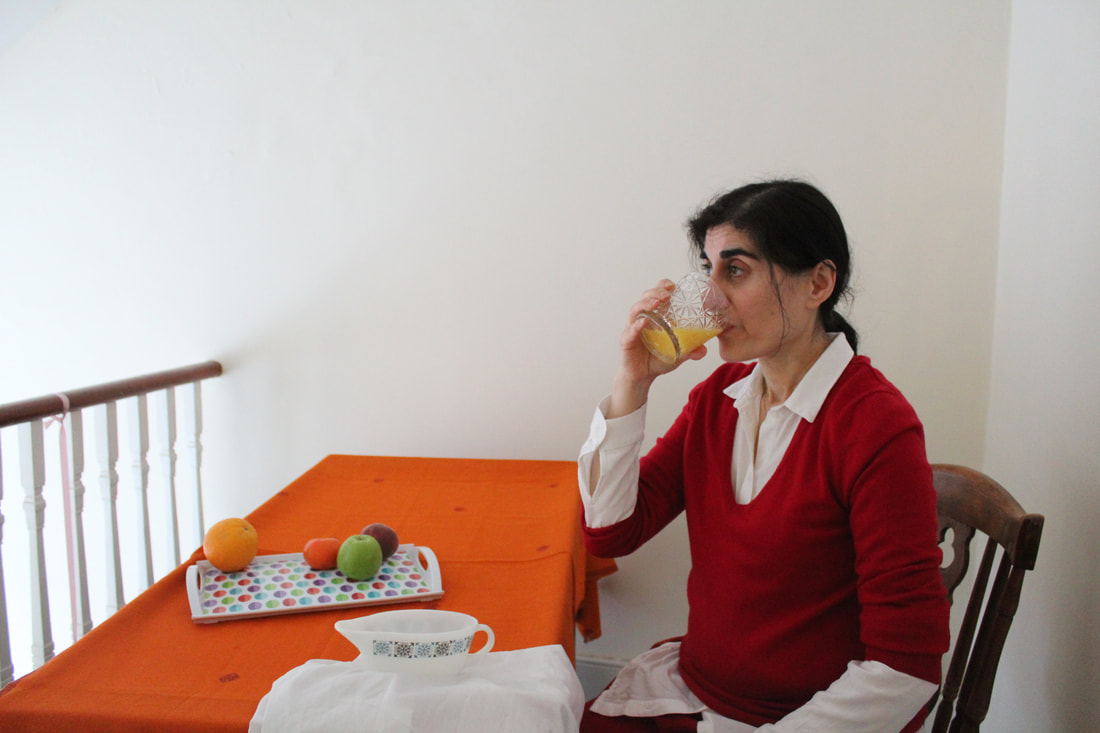
A GIF is a set of images that are put together to create a moving image. They were first introduced in May 1987 by Steve Wilhite to provide a colour format a file. It later became a black and white GIF only. The first GIF was a moving airplane moving over clouds over a still image of an airplane that looked as if it were moving. GIFS have branched out to even smaller file sizes and GIF maker websites as well as turning peoples actions and movements into GIFS. This is why it has had such a surging popularity in digital culture especially around the 90's and early 2000's, because of how expressive they can be. Nowadays reaction gifs are a fundemental part of social media on sites such as Twitter. GIFS are available to be made on Adobe Photoshop, GIF make websites, and even apps on your phone. High-quality visual content makes your emails more memorable and appealing, as most people prefer visuals to text. Using dynamic visuals can also help you create more engaging emails. Interactive elements like videos and GIFS have proven to increase engagement with the viewer, consumer or reader by at least 73%. This also feeds into how GIFS are useful for marketing strategies which make it easier to stand out in blog posts, articles and ads.
What Are Some Examples Of GIFS?


Task
Create your own gif at school with your partner using around 5-10 images
What Will I Need For This Photoshoot?
- A plain background
- A model
- A GIF creator website
GIFS: My First Response (Edited)

Individual Pictures
Second Response
What Went Well + Even Better If
WWW: Good lighting and backdrop
EBI: More pictures and consistent lighting in every photo
EBI: More pictures and consistent lighting in every photo
What Compositional Techniques Have Been Used?
- Balance: I have tried placing the model so she's balanced in the middle of the frame but only the movement of her head has changed
- Depth Of Field: A larger depth of field
- Aperture: A wider aperture has been used
- LIghting: we had no ring lighting in these pictures, but there is some lighting in the pictures
- Rule Of Third: Rule of third has not been applied to this photoshoot
